The digital pre-operative planning of hip currently only works on Apple Macintosh computers running Mac OS X, and requires three distinct elements: OsiriX, the pre-operative hip planning plug-in and hip prosthesis digital templates.
1 - DOWNLOAD AND INSTALL OSIRIX
Osirix commercial version is required:
To the use of pre-operative planning you must have the paid version.
2 - DOWNLOAD PLUGIN PLANNING SURGERY
The hip scheduling plugin is completely free, can be downloaded at this address upon registration:
Plugin operative planning
Once you downloaded the plugin is installed with a simple double click.
3 - DOWNLOAD AND INSTALL THE SCHEDULE TEMPLATES
The planning plugin comes without shiny prosthetic (there are only some shiny examples); the Foundation LIVIO SCIUTTO ONLUS, devoting many human and economic resources, has acquired the necessary know-how to convert and adapt to this plug-in digital templates of the various manufacturers, in order to allow the surgeon to perform the digital preoperative planning.
To this end, the Foundation has created this portal from where you can download after registering the template of the main manufacturers of implants, which have joined the project.
- Downloaded from our site then the required planning templates, choosing between the producers and the currently available plant types. (Fig.1)
- Once you click on '' template Download "the website generates, in the download folder of your Macintosh, a folder called 'Templates' Foundation. (Fig.2)
- Inside the folder it is necessary to double-click on ''Installer.zip', to obtain "Installer.scpt", which must be launched with a double click.
When the script-editor window opens, launch the script by clicking on the gray triangle in the command bar at the top, or by selecting the run command from the script menu to complete the installation of the required plugins.
- To launch the plugin from within OsiriX bring the menu "Plugins" -> "ROI Tools" -> "Hip Templating". (Fig. 3)
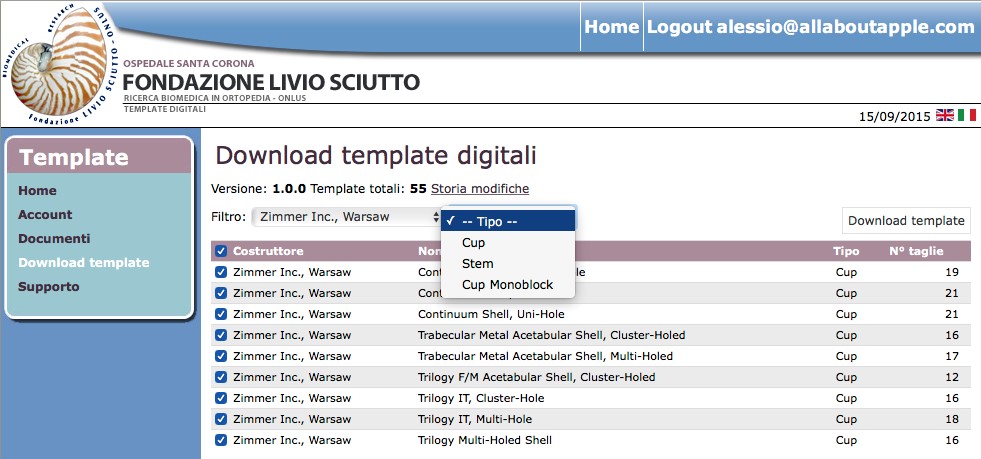
Fig. 1

Fig. 2
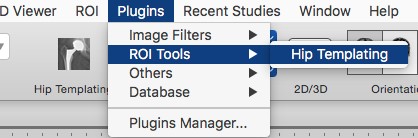
Fig. 3
4 - CALIBRATION TEMPLATE PLANNING
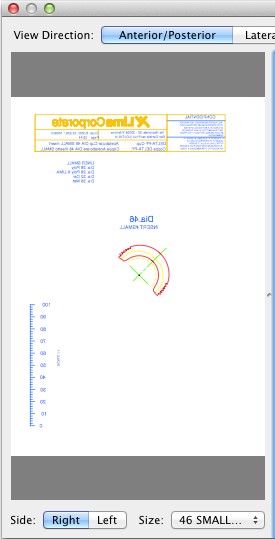
The templates are ready for planning and require no additional configuration; nevertheless, if during the planning of a shiny appear completely white background (Fig. 4), you must make a one-time calibration procedure. As you can see, all the shiny template is visible in white, and in this case OsiriX can not make the schedule (if you try to drag the polished the program closes unexpectedly).
- To calibrate the template by simply drawing a rectangle around the prosthesis (do NOT include portions of rulers, scrolls, texts or anything that is not strictly the prosthetic element), while holding the 'cmd' key on the keyboard (Fig. 6) , so as to obtain the calibrated image. (Fig. 5). With this method we inform OsiriX on the contour of the prosthesis; the program will remember this selection on subsequent schedules and will no longer need to do this.
 |
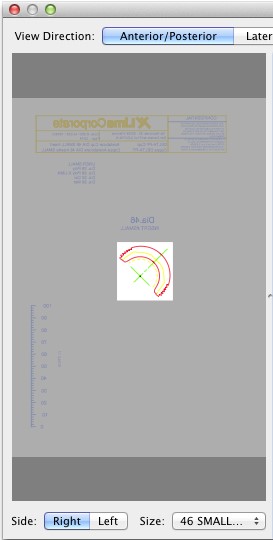 |
Fig. 4 - Condizione iniziale
|
Fig. 5 - Condizione corretta calibrata
|

Fig. 6
For information: info@fondazione.it